
| 4 Open the first new folder that was created which contains the sprites. The names of the files inside all end either with _a.bmp, _p.bmp or _z.bmp. You will ONLY be working with the files that end in _p.bmp, known as the p-sprites. Leave the other files alone! (A future tutorial will cover how to handle them.) Open the p-sprites in your graphics program. |

|
Home
|


| You really can re-colour Sims' objects on a Mac with IFFSnooper ... |
| ... and it has been made possible by the superb Peter Gould, the Mac Guru at SimFreaks. Visit his homepage to learn more about IFFSnooper's features. |

| First find an object to re-colour Most of the single-tiled Maxis chairs, tables, paintings and counters are held in the game's FAR files which are like containers for holding lots of individual files. You will need to use the program called FarSight to open a FAR file. |
 |
Inside the FAR file you might see all sorts of object, sound, accessory, skin and animation files. Find the iff that you want, click Extract and save. |
|
IFFSnooper is a 'work in progress' and is not a finished application. However it is possible to use it in its present
beta state. I use System OS9 and Adobe Photoshop 6 and have also successfully used Macromedia's Fireworks — if you have
a different OS or another graphics program, you'll have to adapt these instructions to fit your configuration. |
| 2 Export the sprite images. You can change the default folder's name if you want to. |
|
In your graphics program you will see that the background is yellow (RGB 255, 255, 0) but it may sometimes be a different colour. |
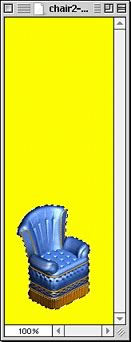
| 6 Re-colour your object. |
Select the yellow and then invert the selection so that just the object is outlined. |
| Make your alterations to the object. I've used Image/Adjust/Hue/Saturation
to change the blues (and also the cyans) to a leathery brown. Other adjustments you could use are Variations or Colour Balance, and Levels to finely tune the contrast. The image should have jaggy edges, so don't try to change them — in fact don't alter the shape of the object in any way. |

| HINT Whatever you do to change the colour on the first p-sprite, write it down because you have to make exactly the same alterations to every p-sprite to maintain consistency. (If you have a huge number of p-sprites to re-colour and are really familiar with Photoshop you could record a Photoshop Action as you make your changes and then 'play' it for each p-sprite.) Make your colour changes to ALL the p-sprites and save them as 24-bit images. |
|
This tutorial shows how a single-tiled object can be re-coloured. First you will need to join the Yahoo! SimLouvre eGroup. Look in Files/Pete's Mac Stuff to download the latest version of IFFSnooper for either System OS9 or OSX. |

| 3 Export the resources (the object's code) by clicking Disassemble. A bullet is put in front of the folder's name to make it easy to identify. |
| 5 Set the graphics mode to RGB Colour (24-bit). |

| Important! You could, of course, re-colour an object you have already downloaded from somewhere else. A CAUTION: over the years, the Sims' Community has developed very strong loyalties to their object creators whose work can be found on a variety of websites. Fans and creators look out for each other and will actively hound anyone who is deemed to have 'stolen' another's object. NOW, if you are going to re-colour an object purely for your own use, no-one will know so no-one can get upset. BUT, if you think you might ever want to share your re-colours or post them on a website then you MUST get the permission of the original author of the object. A GOOD IDEA is to visit Miffy's Architectural Supplies for Sims and carefully study the Re-Colourers' Resource there. Miffy keeps a list of Sims' sites who are happy for others to re-colour their work, but please read and take heed of any conditions of use. |
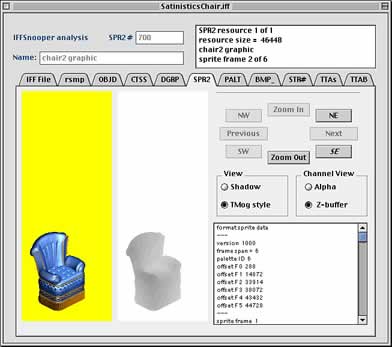
| Maxis saves even more space by putting many different objects into one iff file. Open the file you
have extracted in IFFSnooper. If you click on the DGRP tab and then the Previous/Next buttons, you'll cycle through
all the objects. Take note of the name of the one you want — in this case, 'vegas 1'. |
 |
| Go to the File menu, choose Subclone, select the object you want to re-colour and save it, giving
it a new name if you want to. |
 |
Note: if an .iff file contains only one object, the Subclone item on the menu will be greyed out. |